What are all Requests in Metaphor: ReFantazio? Essentially the game's side quests, Requests can be undertaken throughout your adventure, offering access to optional dungeons, bosses, and rare equipment.
In this Metaphor: ReFantazio guide, we've listed every Request in the game. If you want to unlock the Help Anyone In Need Trophy, you need to complete all of the game's Requests in one playthrough (the Trophy itself only unlocks once you've completed the game).
Subscribe to Push Square on YouTube166k
What Are All Requests in Metaphor: ReFantazio?
Below, you'll find a list of every Request in Metaphor: ReFantazio, complete with information on when they're unlocked, deadlines, and walkthroughs.
Some Requests can be missed, whether through deadlines or not meeting previous Request requirements — so be sure to double check when certain Requests become available as the game progresses.
More's Archetype Research Requests
The Archetype Research Requests that are given to you by More are counted towards your overall Request completion. His Requests are as follows:
- More's Task Chapter One: Ordeal
- Unlock the Gunner Archetype
- More's Task Chapter Two: Solitude
- Increase the Merchant Archetype's Rank to 15
- More's Task Chapter Three: Drifting
- Study 15 different Archetypes
- More's Task Chapter Four: Turmoil
- Increase the General Archetype's Rank to 15
- More's Task Chapter Five: Resolve
- Study 25 different Archetypes
- More's Task Chapter Six: The End
- Increase one Elite Archetype's Rank to 20
Pagan's Dilemma
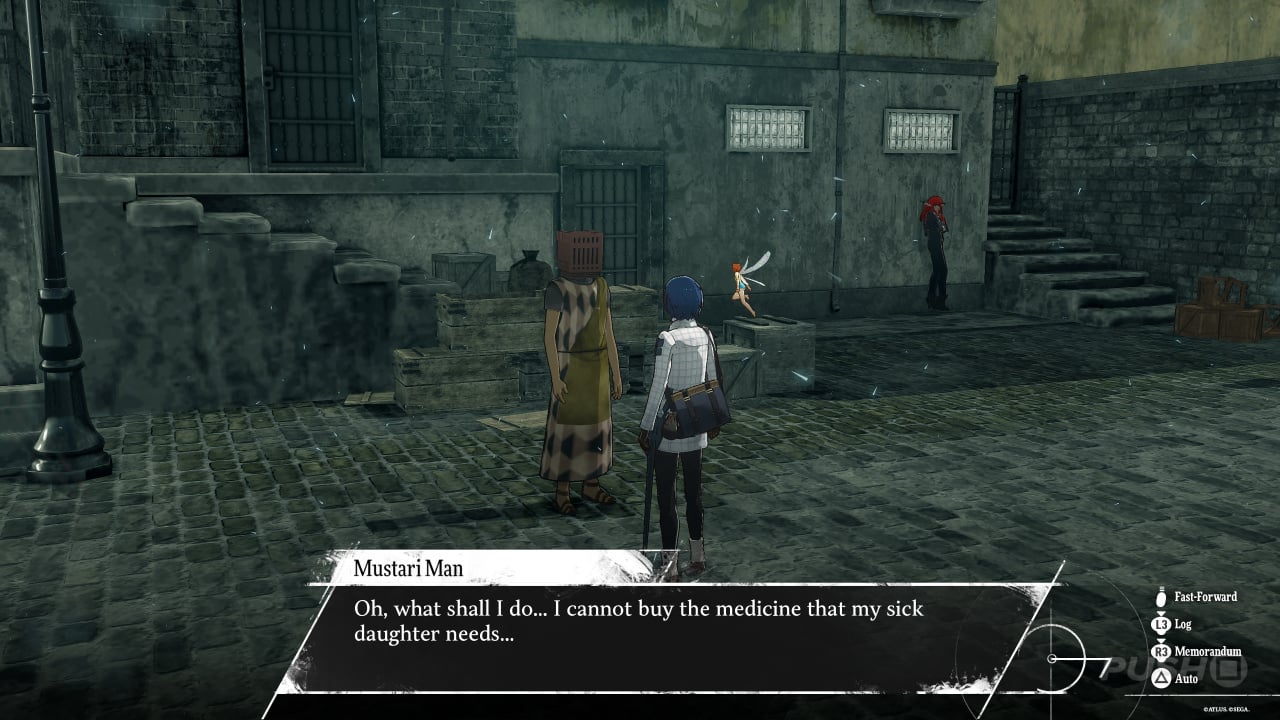
Location: Grand Trad: Sunshade Row
Available From: 6/12
Deadline: 6/16
Walkthrough:
- Talk to the Mustari Man
- Purchase the Breath of Fresh Air from the priest in St. Fermis Church on Sunlumeo Street, for 500 reeve
- Return to the Mustari Man
Reward: Rusted Accessory x1, Tolerance increase
Help the Hushed Honeybee
Location: Grand Trad: Sunlumeo Street
Available From: 6/12
Deadline: 6/19
Walkthrough:
- Talk to the Young Nidia
- At night, visit the Honeybee in Sunshade Row and talk to Fabienne
- Choose to help Fabienne in the kitchen (this will end the night, but your Tolerance will increase)
- Report to the Young Nidia
Reward: Magla Pill, Wisdom increase, 2,000 reeve
A Bullish Embargo

Location: Gran Trad: Sunlumeo Street
Available From: 6/12 (but you'll need at least two days to increase your Wisdom to Rank 2, which is needed to unlock this Request)
Deadline: None
Walkthrough:
- Talk to Brigitta on Sunlumeo Street, outside of the Igniter shop
- With Wisdom level 2, she'll offer you a job
- Speak with the informant in the Honeybee if you want more info
- Buy the Ox Demon of Belega Corridor info for 250 reeve
- Travel to Belega Corridor, either by talking to Brigitta, or by leaving Grand Trad via the main gate
- The target can be found in the deepest part of the dungeon
- The boss is weak to pierce, and doesn't have a huge amount of HP
- Make use of your strongest attacks, but be wary of the monster's party-wide strikes
- Be sure to heal up any party members who drop to half HP or below, as a critical hit from the boss may be enough to kill them
Reward: Pious Igniter, Courage increase, Falchion (boss drop), unlocks Brigitta as a follower
A Friend in Need
Location: Gran Trad: Mausoleum (dungeon)
Available From: 6/12
Deadline: None
- Upon entering the Mausoleum for the second time, you'll automatically encounter a Paripus Woman
- Agree to help find her friend, deeper in the dungeon
- You'll soon come across a locked room with hostages inside, but you'll need a key to open the door
- Go downstairs and enter a door to the right, which leads into another hallway
- You'll see a guard asleep at a table
- The key you need is on a table in the top right corner of the room
- Go back to the locked chamber and open the door
- Talk to the hostage
Reward: 5,000 reeve, unlocks Catherina as a Follower
Providing a Spark

Location: Gauntlet Runner
Available From: Given as the story progresses
Deadline: None
Walkthrough:
- Choose to visit Komero village when you have time, and you'll automatically complete this Request
Reward: Hero's Incense x5, unlocks Neuras as a Follower
Hatching a Plan
Location: Martira: Thoroughfare Square
Available From: 6/29
Deadline: 7/11
Walkthrough:
- Talk to the Gloomy Youth
- Travel to Komero village (it'll be unlocked on your map as soon as you accept this quest)
- Buy the Practical Pigeon Parcel from the village shop for 400 reeve
- Return the parcel to the Gloomy Youth in Martira
Reward: Invincible Noodles, 7,500 reeve
Relic Search
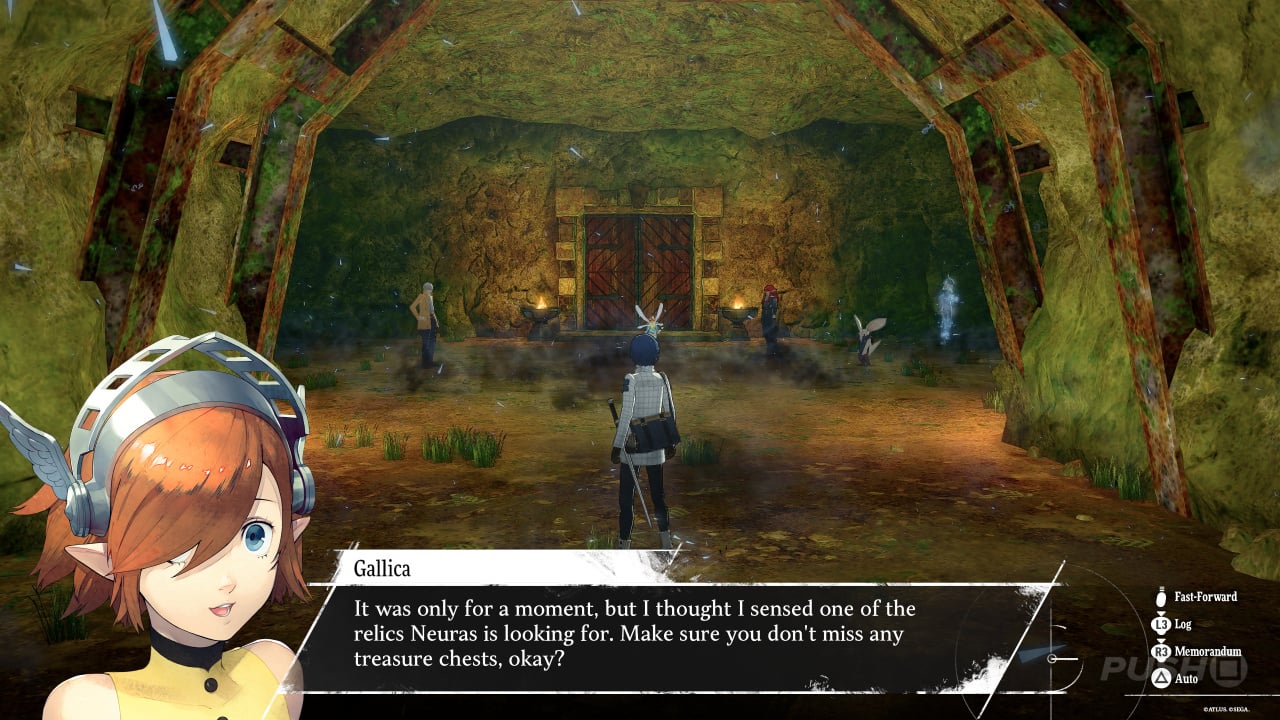
Available From: Complete previous Request 'Providing a Spark'
Deadline: None
Walkthrough:
Gallica will tell you that a Relic is nearby upon entering a dungeon. Relics are shown as objective markers on the dungeon map. Each time you find a Relic, you can return to Neuras and his Bond Rank will increase.
This Request encompasses a series of six Requests:
- Relic Search: Inventor's Bequest (1st Relic)
- Inside of Man-Eater's Grotto, a dungeon that's unlocked by accepting the Bounty 'The Man-Eater in the Mine'
- Relic Search: Dregs of Destiny (2nd Relic)
- Inside the Tomb of Lament, a dungeon that's unlocked by accepting the Bounty 'Grieving Ghost of the Goblet'
- Relic Search: Youth's Folly (3rd Relic)
- Inside the Land of Ceremony, a dungeon that's unlocked by accepting the Request 'The Trial of Malnova'
- Relic Search: Engineer's Destiny (4th Relic)
- Inside the Scoundrel's Hold, a dungeon that's unlocked by accepting the Bounty 'The Greater One-Eyed Scoundrel'
- Relic Search: Bitter Memories (5th Relic)
- Inside the Everfrost Forest, a dungeon that's unlocked by accepting the Bounty 'The Fiend in the Frozen Forest'
- Relic Search
- A Dream's Origin (6th Relic): Inside Mt. Vulkano, a dungeon that's unlocked by accepting the Request 'The Edge of Glory'
Reward: Neuras Bond increases
A Dagger, a Ring, and a Rake
Location: Martira: Thoroughfare Square
Available From: 6/29
Deadline: None
Walkthrough:
- Approach the Pompous Man in the town square
- Talk to the Pompous Man after the scene
- You need Rank 2 Imagination to catch his attention
- You'll unlock the Abandoned Tomb dungeon upon accepting the man's request
- Travel to the dungeon
- Defeat the giant treasure monster deeper in the dungeon
- This boss is weak to light magic
- You can make use of money-based attacks to distract the boss and take one of its turns away
- Use the key on the wall near the dungeon entrance, and take the ring from the chest
- Return to the Pompous Man
Reward: Grius's Memento, 15,000 reeve, Courage increase, unlocks Alonzo as a Follower
A Haunted Heirloom
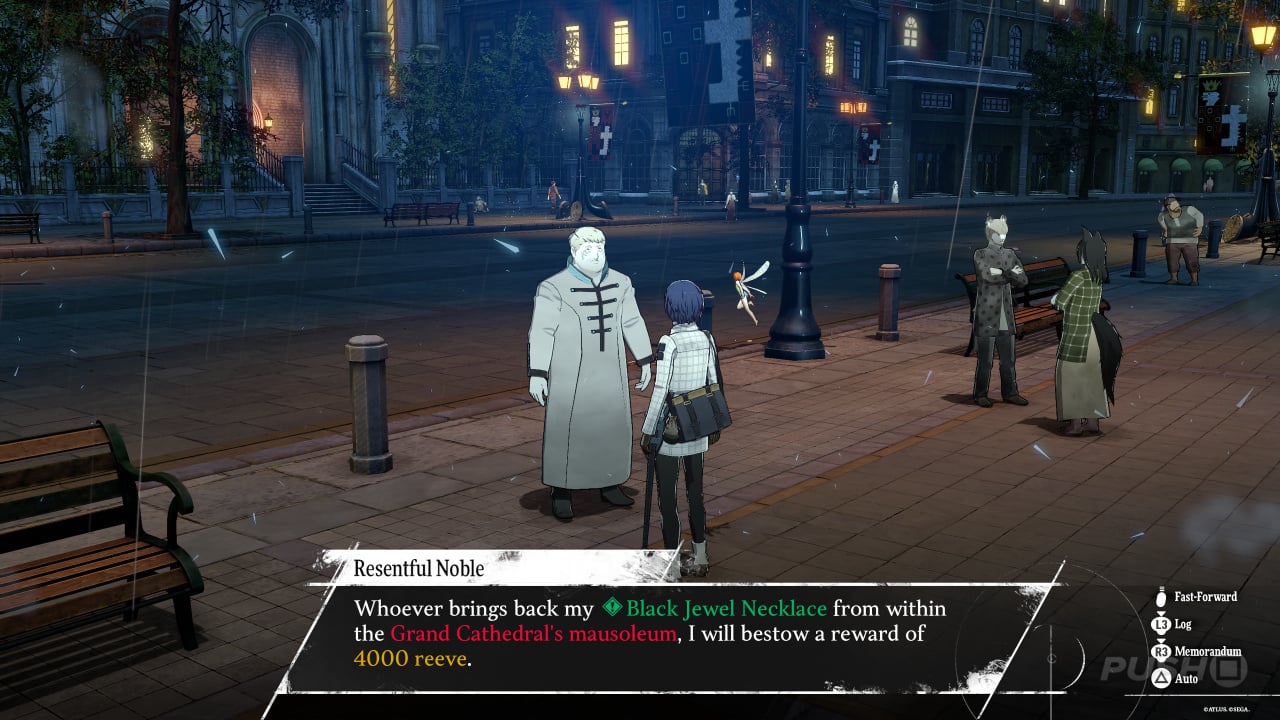
Location: Grand Trad: Sunlumeo Street
Available From: Complete the Bounty 'The New King of the Imps'
Deadline: 7/30
Walkthrough:
- Talk to the Resentful Noble
- Enter the Grand Cathedral mausoleum (dungeon)
- You can explore a newly opened part of the dungeon, just to the left through a gate that was previously locked
- Defeat the boss at the very bottom of the dungeon
- The boss is weak to light, and reflects physical attacks
- The boss can inflict curse, so be sure to bring items that cure curse, or have magic that heals status effects
- The boss drops the requested trinket
- Return to the Resentful Noble
Reward: Sandglass Curiass, 4,000 reeve, Courage increase
Skullduggery
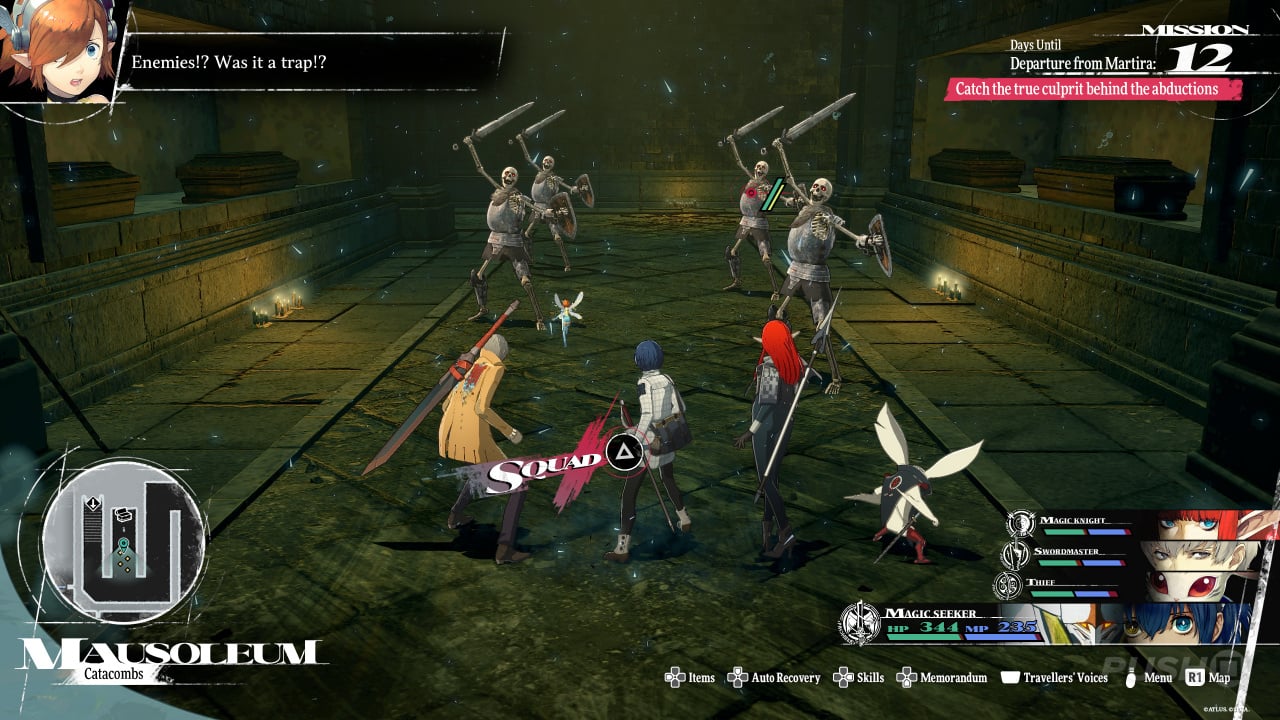
Location: Grand Trad: Grand Cathedral mausoleum (entrance to the dungeon)
Available From: 6/29
Deadline: 7/30
Walkthrough:
- Talk to the Nervous Solider outside of the dungeon entrance
- Enter the mausoleum and collect 8 Mortaskulls from Malmorta (skeleton) enemies
- You can find the enemies in a newly opened part of the dungeon, just to the left through a gate that was previously locked
- Malmorta can ambush you by leaping out of coffins, so be careful
- Report back to the soldier once you have 8 skulls
Reward: Brigandine, 3,000 reeve
The Queen of Cuisine: Heart
Location: Martira: Visca Alba Tavern
Available From: As soon as you complete your main quest in Martira
Deadline: None
Walkthrough:
- Talk to the Classy Woman standing in the tavern
- You'll need to acquire some Mellow Milk for a cooking recipe
- You can either milk the cows in Martira (this is a Tolerance-boosting event you can find on the map) or you can buy Mellow Milk from the water seller in the village square
- There are other sources of Mellow Milk later in the game, and it can sometimes be found at random in the Gauntlet Runner's pantry
- The dish the Classy Woman wants is Benevolent Bread
- You may have to wait until later in the game for this recipe to become available (just check the cooking bench to find new recipes as the game progresses)
- It may be easier to just wait until near the end of the game to complete this quest, as you'll have direct access to all of the different ingredient sellers across the kingdom
- You'll also need Fragrant Spice and Orgo Sugar to make this dish — both can be bought at various food stalls throughout the game
Reward: Limp Goldfish, Brocaded Koi, 5,000 reeve
The Queen of Cuisine: Soul
Location: Grand Trad: Sunlumeo Street
Available From: As soon as you've completed the previous Request 'The Queen of Cuisine: Heart'
Deadline: None
Walkthrough:
- Meet with the Classy Woman again, who's moved to Sunlumeo Street
- This time, the woman is looking for a dish called Indestructible Honey Cake
- As with the previous cooking task, it may be easier to just wait until near the end of the game so you can just grab all of the ingredients at once from different sellers
- You may have to wait until later in the game for this recipe to become available at the kitchen bench
- You'll need 2 White Peach Turnips (can be bought from the butcher near the cathedral in Grand Trad)
- 2 Altabury Wheat Flower (which can be bought across various stalls)
- 1 Lumibee (you can collect Lumibees from around the campfire, when camping at night aboard the gauntlet runner)
Reward: Lord of the Lake, 30,000 reeve, Eloquence increase
Soldier's Solace
Location: Port Brilehaven: Angler's Inn Square
Available From: 7/23
Deadline: None
Walkthrough:
- Speak to the Exhausted Woman
- Travel to Gracia Forest dungeon, which appears on the map once you've accepted this Request
- Gather all 7 Dragonthistle berries across the dungeon (their locations appear on the map)
- Defeat the dungeon boss that appears once all of the berries have been claimed
- Return to the Exhausted Woman
Reward: Serum Gloves (boss drop), Dragonblood Sap, 30,000 reeve
Superior Scrimshaw
Location: Port Brilehaven: Merchant's Bazaar
Available From: 7/23
Deadline: None
Walkthrough:
- Speak to the Craftsman
- Speak to the informant at the tavern in Brilehaven to unlock the Forsaken Tower on your map
- Travel to the Forsaken Tower dungeon
- Defeat the boss in the dungeon's depths
- Return to the Craftsman
Reward: 25,000 reeve, Courage increase
Deeds and Diversions
Location: Port Brilehaven: Angler's Inn Square - Nightprowler
Available From: 7/23
Deadline: None
Walkthrough:
- Speak to the Overfamiliar Man
- Before you go any further in this Request, note that you must first visit the Forsaken Tower and defeat the dungeon boss there as part of the Request 'Superior Scrimshaw'
- Take a ferry over to the Arenafront Wharf
- Go up the ramp to the Arena
- Speak with the Pompous Noble
- Select the dialogue option "You know me, I trust?"
- Select the dialogue option "Such a tawdry arena, this."
- Select the dialogue option "I prefer real fights."
- Select the dialogue option "You know the Forsaken Tower?"
- Select the dialogue option "I'd like the Deed."
- Return to the Overfamiliar Man
Reward: Chef's Toque, 10,000 reeve
The Chalice vs. The Brew
Location: Port Brilehaven: Arenafront Wharf
Available From: 7/23
Deadline: None
Walkthrough:
- Speak to the Brewer
- The chalice he wants you to find is dropped by the target of the Bounty 'Grieving Ghost of the Goblet'
- Once you've completed the Bounty and you have the chalice, take it back to the Recruitment Centre first so you can claim the reward
- Return to the Brewer
Reward: Miraculous Mead, 7,500 reeve
Dental Distress
Location: Port Brilehaven: Seabreeze Street
Available From: 7/23
Deadline: 8/9
Walkthrough:
- Speak to the Sullen Man
- Travel to Inundo village on the map
- Purchase the Toothbrush of Hygienia for 500 reeve
- Return to the Sullen Man
Reward: 15,000 reeve, Gold Beetle
Efflorescent Youth
Location: Port Brilehaven: Seabreeze Street
Available From: 7/23
Deadline: 8/10
Walkthrough:
- Speak to the Kindly Boy
- Travel to St. Fermis Church in Grand Trad: Sunlumeo Street
- Buy the Rainbow Flower for 500 reeve from the priest
- Return to the Kindly Boy
Reward: 4,000 reeve, Tolerance increase
A Noble's Legacy
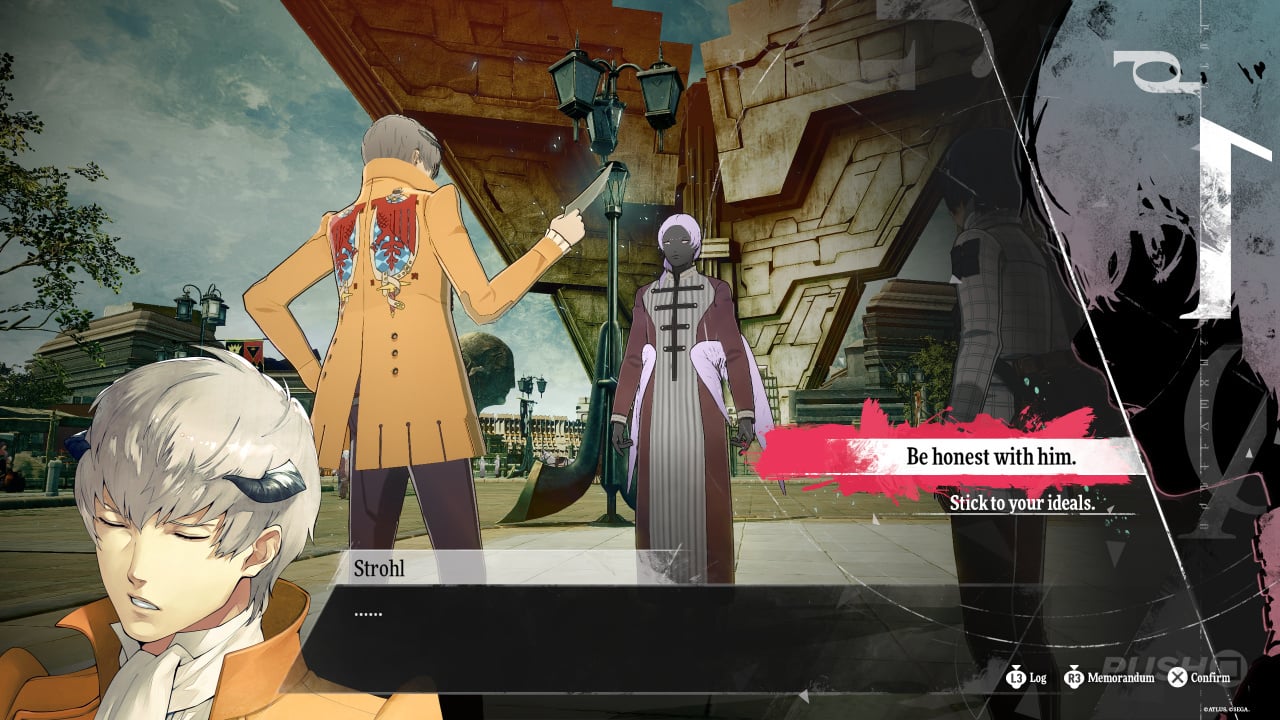
Location: Given to you by Strohl at Bond Rank 5
Available From: Strohl Bond Rank 5 (requires Imagination Rank 3 to complete)
Deadline: None
Walkthrough:
- Go to the market in front of the Grand Cathedral in Grand Trad
- Speak to the Fishmonger
- Speak to the Capital Merchant closer to the cathedral
- Select the dialogue option "Did his fish stink? (Imagination Rank 3)"
- Return to Strohl
Reward: Unlocks Strohl Bond Rank 6
Defeat the Coliseum Monster
Location: Port Brilehaven: The Varmareno Coliseum
Available From: After progressing the story while in Brilehaven
Deadline: None
Walkthrough:
- Speak to the receptionist at the coliseum
- Defeat the monster in three turns
- The monster resists fire, but it doesn't have a huge amount of HP, so just try and hit it with your most powerful attacks
- Don't waste any time healing — just hit the monster as hard as you can
Reward: 25,000 reeve, unlocks coliseum 'Ranked League' battles
Peak Curiosity
Location: Virga Island: Village of Pagans
Available From: 8/19
Deadline: None
Walkthrough:
- Speak to the Dejected Man
- Buy information on the Spire of Blind Faith from the informant at the village tavern — this will unlock the dungeon on your map
- Travel to the dungeon
- Speak with the Confident Woman at the entrance and agree to help her
- Defeat the boss at the top of the tower
- Return to the entrance and give the notebook to the woman
- Return to the Dejected Man
Reward: Hero's Jeweled Root, Courage increase, 60,000 reeve
The Price of Hope
Location: Virga Island: Village of Pagans
Available From: 8/19
Deadline: None
Walkthrough:
- Speak to the Enthusiastic Woman
- Travel to the igniter shop in Grand Trad and speak to the man at the counter
- Select 'Listen' from the menu
- When the igniter seller questions your request, mention Brigitta (you'll need to have her unlocked as a Follower)
- Return to the Enthusiastic Woman
Reward: Gleaming Crystal, 10,000 reeve, Wisdom Increase
Save the Mourning Snakes
Location: Virga Island: Village of Pagans
Available From: 8/19 (after securing the main story potion)
Deadline: None
Walkthrough:
- Talk to Junah and accept her Request
- You'll unlock the Orbwise Path dungeon on the map
- Travel to the new dungeon
- Defeat the boss monster in the depths of the dungeon
Reward: Imagination increase, unlocks Junah as a Follower
A Guiding Gift
Location: Virga Island: Village of Pagans
Available From: 8/19 (after leaving the village once and returning)
Deadline: 8/30
Walkthrough:
- Speak to the Hoarse Fisher-Crone
- Travel to the Dragon Temple (the dungeon that's unlocked in the main story)
- You can find the stones scattered around the dungeon as glowing items on the ground
- You only need to collect one stone to complete this Request, but you'll be rewarded more handsomely for collecting three
- Two stones can be found in the labyrinth part of the dungeon, while another can be claimed in the opening area
- Return to the old woman
Reward: Passionate Wraps, 22,500 reeve
The Trial of Malnova
Location: Virga Island: Village of Pagans
Available From: Becomes available after solving the island's problem in the main story
Deadline: None
Walkthrough:
- Speak to Eupha, and you'll unlock a new dungeon called Land of Ceremony
- Travel to the dungeon
- Defeat the boss in the dungeon's depths
Reward: Wisdom increase, unlocks Eupha as a Follower
Warmth in Winter
Location: Altabury Heights: Dia Franco Street
Available From: 9/13
Deadline: None
Walkthrough:
- Speak to the Portly Man
- Travel to Malva, which is unlocked on your map after accepting this request
- Buy the Durable Spider Silk from the town shop for 500 reeve
- Return to the Portly Man
Reward: Mountaineer Gloves, Tolerance increase, 25,000 reeve
Proof of Power
Location: Altabury Heights: Opera House Square
Available From: 9/13
Deadline: None
Walkthrough:
- Talk to the Obsessive Soldier
- Visit the informant in the Altabury Heights tavern and buy the information about the Tower of Insolence
- Travel to the Tower of Insolence now that it's unlocked on your map
- Venture to the tower's highest point and defeat the boss
- This boss will summon another boss on its first turn
- Both bosses must be defeated on the same turn; if only one of them is left, they'll just keep summoning partners
- Return to the Obsessive Solider
Reward: 55,000 reeve, Courage increase
Defeat Milo
Location: Altabury Heights: Dia Franco Street
Available From: 10/13
Deadline: None
Walkthrough:
- To start with, you'll need to track down Loveless, the blue-furred tournament candidate in Altabury Heights
- After speaking to him, his Gauntlet Runner will be placed on your map, on the road to Malva
- Malva is a town that's unlocked on your map through the Request 'Warmth in Winter'
- When you head to Malva for that quest, you'll come across Loveless, and he'll fight you
- He's weak to light magic, and relies on physical pierce and strike attacks
- Once defeated, Loveless will return to Altabury Heights, on Dia Fanco Street
- Speak to him and accept this Request
- Talk with Milo just outside of the recruitment centre in Altabury Heights
- You'll unlock Milo's Runner as a location on your map
- Travel to his Runner and fight Milo
- Milo is weak to fire, ice, wind, and electric magic
- Milo can buff all of his stats and negate elemental damage, so it's wise to make use of debuff and break magic to open up his weaknesses as often as you can
- Milo's biggest threat is his Beguiling Sigh skill, which can charm the whole party
- It's a good idea to equip accessories that block charm, or have a party member use Knight Archetype skills to force Milo into focusing on them
- Cure charm as quickly as possible, as your party members will start attacking one another for big damage
- Once Milo is defeated, return to Loveless
Reward: Narcissus Brooch (boss drop), Sumptuous Magla Feast, 40,000 reeve
The Edge of Glory
Location: Grand Trad: Sunshade Row
Available From: 9/26
Deadline: None
Walkthrough:
- Speak to the Ornamented Man
- You'll unlock a new dungeon called Mt. Vulkano
- You can speak with the informant in Altabury to learn more about the dungeon and its monsters
- You don't need to beat a boss to fulfil this request — you just need to grab the rusted sword from a treasure chest at the bottom of the dungeon
- Bring the sword back to the Ornamented Man
Reward: Beloved Greatsword, Wisdom increase, 30,000 reeve
Deliver Hot Spring Water
Location: Altabury Heights: Blue Sky Bridge
Available From: 9/26
Deadline: None
Walkthrough:
- Talk to the Gentle Merchant
- Go to the hot spring on the lower level of Blue Sky Bridge
- The hot spring is only open at night, so you won't be able to go if you've been to a dungeon during the day
- Choose to enter the hot spring (doing so will advance time)
- Return to the Gentle Merchant
Reward: Almighty Panacea x1, 20,000 reeve, Gold Beetle
Become Champion of the Coliseum
Location: Port Brilehaven: The Varmareno Coliseum
Available From: As soon as you unlock Ranked Battles at the coliseum, having completed the previous Request 'Defeat the Coliseum Monster'
Deadline: None
Walkthrough:
- When you have free time, speak to the Spirited Receptionist at the coliseum counter
- You'll need to progress through Bronze, Silver, and finally Gold ranks to complete this Request
- Silver matches have higher level enemies than Bronze, and Gold has some of the highest level enemies in the game
- One match takes up one chunk of free time, but you can enter in the afternoon or at night — or both in one day
- You'll need to come back to the coliseum as you continue your adventure, so that you're at the appropriate level for each challenge
Reward: Yggdrasil Crown, 130,000 reeve
Trial of the Dragon: Bygone Legacy
Location: Altabury Heights: Blue Sky Bridge
Available From: 9/26
Deadline: None
Walkthrough:
- Talk to the Enraged Mustari
- Travel to The Tower of Insolence
- This version of the tower isn't the same as the one you may have adventured through previously
- The dungeon is now infested with much more powerful monsters, around level 70 or so
- However, treasure chests that you previously opened throughout the dungeon will remain opened, with nothing new to offer
- Your goal is to make it to the very top of the tower, beyond where you may have fought the boss from a past Request or Bounty
- You'll find a new save point, followed by new boss at the summit
- This boss will inflict poison and hex with its attacks, meaning that curatives are a necessity
- The boss repels all damage except almighty, so you need to come into this fight packing some powerful almighty skills, or skills that ignore resistances
- You'll need to keep your HP topped up, as the enemy will actually cap your party members' HP at 300 for most of the fight
- With your HP capped, it may be best to stay in the back row for this battle
- Fortunately, the boss doesn't have any hugely damaging attacks — it's built to wear you down over time
- As long as you cure the status effects and keep hammering it with almighty or resistance-breaking skills, you should overcome the trial eventually
Reward: Cardinal Dragon Armour
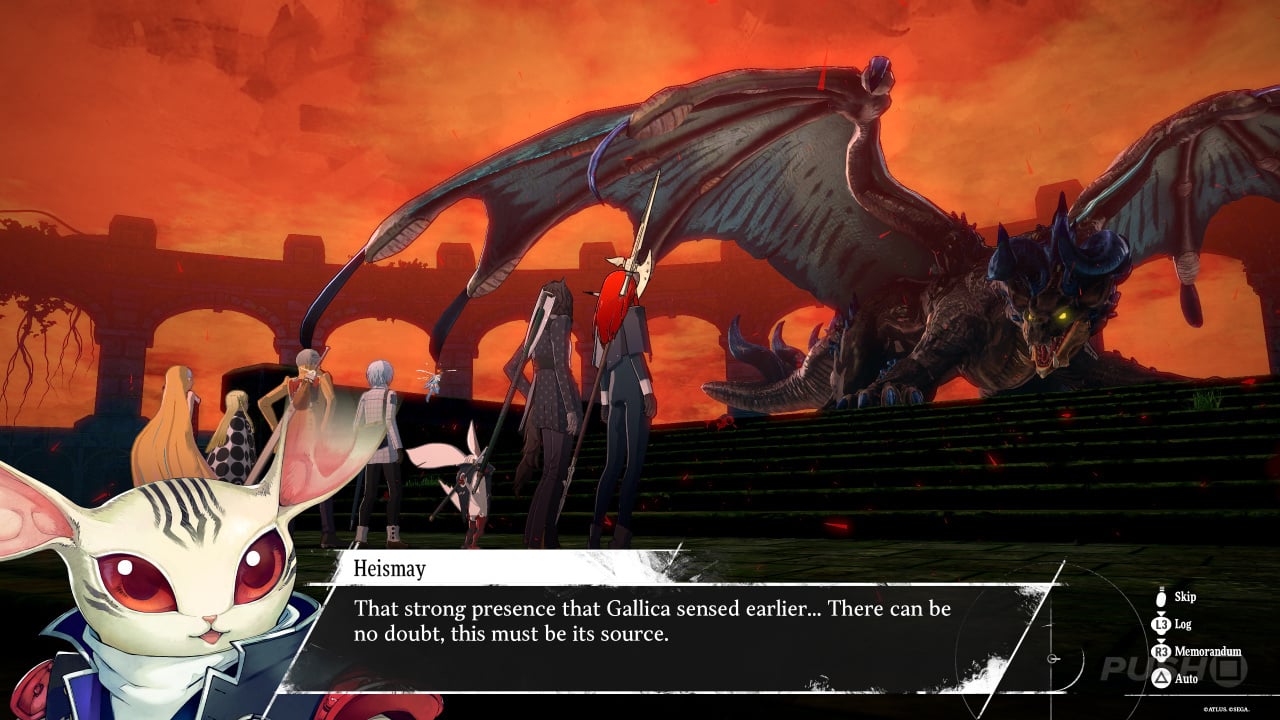
Trial of the Dragon: Heroes' Rest
Location: Eht Ria
Available From: 9/27, after accepting the previous Request 'Trial of the Dragon: Bygone Legacy'
Deadline: None
Walkthrough:
- Before you embark on this quest, you must have a way to completely nullify fire damage, or the boss will simply kill your entire party in one hit
- As such, it's highly recommended that you acquire the Cardinal Dragon Raiment from the Trial of the Dragon: Mad Mischief Request, or the Cardinal Dragon Armour from the Trial of the Dragon: Bygone Legacy Request, before taking this Request on
- Speak with Edni in Eht Ria
- Travel to the Spire of Blind Faith
- This version of the tower isn't the same as the one you may have adventured through previously
- The dungeon is now infested with much more powerful monsters, around level 70 or so
- However, treasure chests that you previously opened throughout the dungeon will remain opened, with nothing new to offer
- Your goal is to make it to the very top of the tower, beyond where you may have fought the boss from a past Request or Bounty
- You'll find a new save point, followed by new boss at the summit
- Shockingly, this boss isn't weak to ice, despite its appearance
- As mentioned, this boss uses a one-hit kill, full-party fire skill when its HP is around half; you must have equipment or skills that nullify fire to survive this
- When this attack does inevitably hit, you have two choices: you can either try to revive your allies (which isn't really recommended since they'll just be killed again soon enough), or you can simply continue fighting with the character(s) who are immune to fire
- For most players, fighting on with just one character is going to be your only option, and so you'll want to equip an accessory that nullifies charm, negating one of the boss' charm-inducing skills
- With all of this in mind, it's best to enter this boss fight with the intent of dealing as much damage as possible as quickly as possible, so your fire-immune party member has less work to do when they're fighting solo
Reward: Cardinal Dragon Robe
Trial of the Dragon: Mad Mischief
Location: Port Brilehaven: Angler's Inn Square
Available From: 8/27, after accepting the previous Request 'Trial of the Dragon: Bygone Legacy'
Deadline: None
Walkthrough:
- Speak with the Gabby Mustari
- Travel to Forsaken Tower
- This version of the tower isn't the same as the one you may have adventured through previously
- The dungeon is now infested with much more powerful monsters, around level 70 or so
- However, treasure chests that you previously opened throughout the dungeon will remain opened, with nothing new to offer
- Your goal is to make it to the very top of the tower, beyond where you may have fought the boss from a past Request or Bounty
- You'll find a new save point, followed by a new boss at the summit
- The boss repels fire
- Really, this fight is all about managing status elements, as the boss can inflict paralysis, burning, and frostbite across multiple party members
- If you can use equipment to guard against some or all of these status effects, that's perfect, otherwise focus on curing it with items or magic
- Watch out for its powerful fire breath attack, which can leave the whole party with burns
- Again, you'll need to cure these status effects up whenever possible; party-wide healing is also an absolute must
- If things get rough, retreat to the back row and try to be defensive
- If possible, try and remove the boss' stat boosts with specific skills, otherwise it'll hit like a sledgehammer for most of the fight
- As always, lowering the enemy's hit rate is a solid strategy
- This will likely be a long and difficult battle, which means you need to make good use of your turns; it's better to be cautious, and keep everyone's HP topped up
Reward: Cardinal Dragon Raiment
Wayward Shepherd
Location: Given to you by Eupha at Bond Rank 6
Available From: Eupha Bond Rank 6
Deadline: None
Walkthrough:
- Head to Mt. Vulkano at Eupha's request
- There's a ladder on the second-bottom floor of this dungeon that won't be accessible until you accept this Request
- Descend the ladder and continue through the dungeon
- You'll find the boss at the deepest part of the dungeon
- The boss uses magic attacks that hit all party members, both almighty and dark
- It's best to have access to party-wide healing magic to keep everyone's HP topped up
- Raising your defence isn't a bad idea either
- Later in the fight, the boss will attempt to hex the party — try to heal this off as soon as you can so that you can stay on the offensive
Reward: Inquisitor's Crosier (boss drop), Eloquence increase, Eupha Bond Rank 7 unlocked
The Right to Rule
Location: Given to you by Bardon at Bond Rank 6
Available From: Bardon Bond Rank 6
Deadline: None
Walkthrough:
- Go speak with Bardon when you have time, after having accepted his Request
- It's easier to simply select Bardon from the Follower menu and travel to him from there — sometimes he won't actually be present in the town square
- Make sure you're ready for a fight
- Defeat the Greatworm — you may remember this creature from earlier in the game
- Bardon will back you up in this battle, providing stat boosts at the start of the party's turn
- It's weak to ice, so hit it with the strongest magic you have
- It'll use a party-wide sweeping attack to do most of its damage, so be careful if any of your allies are weak to strike
- Try to boost your party's defence, and keep your HP topped up with multiple target healing magic
- Depending on when you take this monster on, this may be a much easier fight than anticipated
- Talk with Bardon once the boss is defeated
Reward: Courage increase, Bardon Bond Rank 7 unlocked
Petty Thief
Location: Given to you by Neuras at Bond Rank 7
Available From: Neuras Bond Rank 7
Deadline: None
Walkthrough:
- Talk to the guard outside of the recruitment centre in Grand Trad
- You'll learn that the thief is heading towards the mines aboard his Gauntlet Runner, which you can now travel to on the map
- Make for the Gauntlet Runner and be ready for battle
- Defeat Jin
- The biggest issue in this fight is Jin using magic to reduce your hit rate, so it helps to have a skill that restores stat drops for the party
- It's a fairly straightforward fight, especially if you focus on Jin's guards first, exploiting their electric and fire weaknesses
Reward: Neuras Bond Rank 8 unlocked
A Brother's Mercy
Location: Given to you by Basilio at Bond Rank 7
Available From: Basilio Bond Rank 7
Deadline: None
Walkthrough:
- After accepting this Request, speak with Basilio during the day
- Defeat the enemy
- This boss is resistant to physical attacks, so unleash all of your most powerful magic
- The boss only attacks with physical moves, most of which hit all party members at once
- The real issue with this foe is that it can inflict daze, greatly lowering your hit rate
- Cure daze as soon as you can, to prevent the battle from dragging out
- It's worth keeping an eye on your party's overall health, as the boss is capable of dealing chunky damage — especially if it gets some critical hits
Reward: Murderer's Axe (boss drop), Tolerance increase, Basilio Bond Rank 8 unlocked
Trial of the Dragon: Essence of Power
Location: Unlocked upon completing the three previous Trial of the Dragon Requests
Available From: After completing the three previous Trial of the Dragon Requests
Deadline: None
Walkthrough:
- Travel to the Dragon Temple
- You can fast travel straight to the Magla Hollow at the Divine Altar Path
- From there, just head straight towards the objective marker and open the door
- This boss switches between Archetypes per turn, giving it a massive range of skills
- For starters, having skills that nullify an enemy's buffs is a huge help here, as the boss will constantly buff itself before attacking
- The boss has no weaknesses, and it'll erect barriers against various elements as the fight goes on
- As such, having access to almighty skills and skills that ignore resistances can be a real boon as the battle wears on
- As always, lowering the boss' hit rate and attack can help you survive for a lot longer
- Keep your HP topped up as often as you can; the boss can inflict one-time weaknesses to all kinds of damage, which can rack up very, very quickly as the fight continues
- Being able to remove debuffs from your own party helps a lot as well
- Overall, it's probably best to play it safe with this boss, reacting to what its current Archetype is and being wary of its damage potential
- As per usual, the Knight Archetype's attention-grabbing skills can save you from serious trouble; a few of the boss' Archetypes focus on single-target attacks, and so diverting them all towards one party member lets you manage the fight effectively
- When the boss is on low HP, it'll start using Hero's Cry every turn, giving it four extra turns
- This is when things get really difficult, and keeping your HP high becomes more important than ever
- However, you can't simply ignore your own damage output, as the boss gains access to a one-hit kill attack that'll wipe out your whole party
- This attack arrives when the boss starts using Hero's Cry, and then cycles all the way through to the Prince Archetype at low HP
- When the boss is on a small amount of HP — around 15% — you need to hit it with everything you've got in order to avoid the instant kill
- Dropping the boss' defence and making use of your most powerful synthesis skills is a necessity here
Reward: Radiant Crystal (boss drop), Dragon's Legacy
Have you completed all Requests in Metaphor: ReFantazio? Check out our Metaphor: ReFantazio guide for more help with the game, and be sure to report your success in the comments section below.


Comments 0
Wow, no comments yet... why not be the first?
Leave A Comment
Hold on there, you need to login to post a comment...