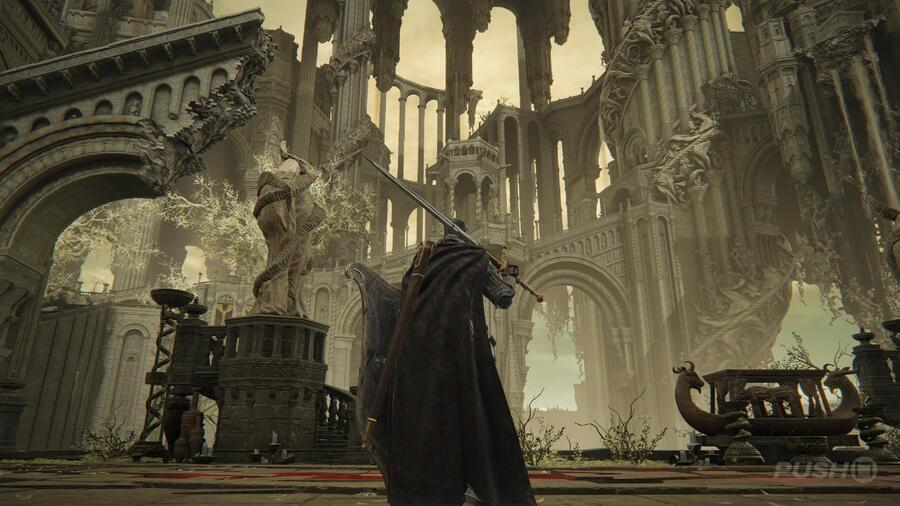
Enir-Ilim is a main area in the west of the Realm of Shadow in Elden Ring DLC Shadow of the Erdtree, and hosts a Boss Fight against Promised Consort Radahn. In this Elden Ring guide, we are going to reveal how to complete Enir-Ilim via a step-by-step walkthrough.
How Do You Complete Enir-Ilim in Elden Ring?

On this page, we're going to reveal how to complete Enir-Ilim. We'll include the location, a step-by-step walkthrough, and any additional information, like item drops.
Enir-Ilim Location: How to Find It
Enir-Ilim is a mysterious structure up in the skies of the Realm of Shadow you can only access through main story progression; you can't simply access it through open world exploration. First, you'll need to acquire Messmer's Kindling by beating Messmer the Impaler in Shadow Keep, then take it to the Ancient Ruins of Rauh. In this area, you'll beat Romina, Saint of the Bud and use the Messmer's Kindling to burn the tree found beyond the Church of the Bud. Having done so, a cutscene will automatically transport you to Enir-Ilim.
Enir-Ilim: Walkthrough
Having been transported to Enir-Ilim in the cutscene, activate the Site of Grace ahead of you and ascend the staircase for a better view of the place. From your left, a new enemy type — it's the dual-wielding enemies from the past decked out in gold armour — to immediately face. They can drop the Divine Bird Warrior Greaves if you're lucky. Climb the staircase they came from and in the middle of the room you come to, there'll be another Site of Grace for First Rise.
From here, there are three paths open to you, but only one actually holds the way forward. Up the staircase leads to a dead end with a Somber Smithing Stone [5] and the elevator heads down to create a shortcut back to Belurat, Tower Settlement. You want the path on the same floor as the Site of Grace, leading back outside to full of golden trees. In this courtyard area, you'll find a Rune Arc by going through the little chapel to the right and jumping out the window, then kill the incredibly large enemy by the fountain for a Revered Spirit Ash. In this very same area, head down to the level below and grab another Revered Spirit Ash from in front of the statue the enemies are praying at. With both those picked up, you can head up two floors in this courtyard area to meet a particularly powerful enemy attuned to Lightning. We recommend equipping the Boltdrake Talisman +3 for this fight. When it's over, use the tree in the back of this area to climb across to a small ledge holding a new Spell called Spira.
Cross back over to where the enemy was and head up the staircase, ascending it all the way to the top and pushing open the set of stone double doors to find a Site of Grace in Spiral Rise on the other side. Here you'll find a Scadutree Fragment and a Miquella Cross to interact with. From here, head up the twisting staircase once you've rested and climb out onto the balcony just before the end where the floor gives way. Head to the right along the rooftops, taking care with three large birds that await your presence — they're tougher than they look when they gang up on you.
When you reach the staircase having jumped over, first head left for another Revered Spirit Ash, then drop down onto the staircase below to enter a room with a new Ashes of War called Horned Warrior Ashes inside. You can then use the two ladders in succession of one another to climb the tower you're in, then cross the rooftops to return inside the Spiral Rise tower. At the very top, a big staircase leads you to a Site of Grace in the Cleansing Chamber Anteroom.
When you climb the steps into the next room, you'll be greeted by Needle Knight Leda and challenged to fight her and her allies. To do so, interact with the red invasion sign. You should have a gold summon sign of your own for Pureblood Knight Ansbach, but note "this cooperator will not arrive until the time is right". The fight will begin against Redmane Freyja, then Hornsent will arrive. Dryleaf Dane arrives next, and then finally Needle Knight Leda. You'll have help from Pureblood Knight Ansbach, who is seemingly invincible throughout the encounter. Once they're all dead, you can loot their corpses to get all their weapons and armour.
After the fight, continue up the corridor and take the elevator up to Sir Ansbach. Talk to him, then climb the staircase and activate the Site of Grace for the Divine Gate Front Staircase. There's a fog door up ahead, and you'll be fighting Promised Consort Radahn first. For guidance covering how to beat Promised Consort Radahn, click the link.
Enir-Ilim: Item Drops and Loot
- Somber Smithing Stone [8]
- Divine Bird Warrior Greaves
- Somber Smithing Stone [5]
- Messmerfire Grease
- Broken Rune
- Rune Arc
- Revered Spirit Ash
- Whiteflesh Mushroom
- Thin Beast Bones
- Redflesh Mushroom
- Spira
- Scadutree Fragment
- Smithing Stone [8]
- Silver Horn Tender
- Horned Warrior Ashes
- Leda's Sword
- Freyja's Greatsword
- Freyja's Helm
- Freyja's Armor
- Freyja's Gauntlets
- Freyja's Greaves
- Falx
- Caterpillar Mask
- Braided Cord Robe
- Braided Arm Wraps
- Soiled Loincloth
- Dryleaf Robe
- Dryleaf Arm Wraps
- Dryleaf Cuissardes
- Dane's Footwork
- Oathseeker Knight Helm
- Leda's Armor
- Oathseeker Knight Gauntlets
- Oathseeker Knight Greaves
Did you find our guide covering how to complete Enir-Ilim in Elden Ring helpful? Share any of your own strategies in the comments below and check out our Elden Ring guide for more guidance and information.


Comments 0
Leave A Comment
Hold on there, you need to login to post a comment...