In this sixth part of our Silent Hill 2 Walkthrough, which presents a step-by-step guide to completing the entire game on PS5, including Collectibles, we'll be covering Toluca Prison. James finds himself down here after jumping down a hole in the Historical Society.

This Walkthrough is intended for a playthrough where the Combat Challenge and Puzzles Challenge are both set to the Standard option. For more information covering Combat and Puzzles difficulty options, click the link. This page offers a full guide through the location, from when you drop down from above until reach the Labyrinth. Also included is the Witness Room Generator solution and how to solve the Gallows Puzzle in the Yard.

Note: This page is considered a work in progress as we're still tracking down the last few Collectibles in the game.

Silent Hill 2: Toluca Prison Walkthrough - All Collectibles: Memos, Glimpses of the Past, Strange Photos
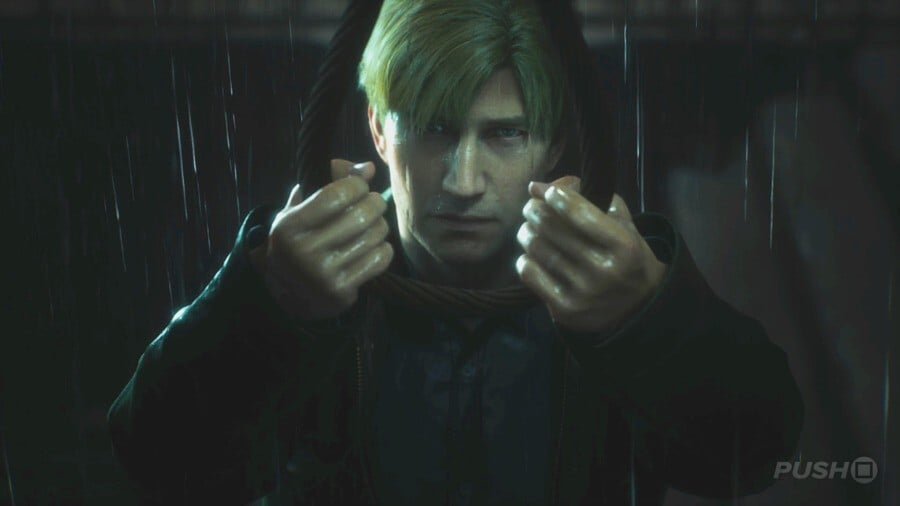
Silent Hill 2: Toluca Prison Walkthrough 1
Image: Push Square

After using the Spiral-writing Key up on the big grate in the Historical Society, you'll drop down into Toluca Prison, more specifically its Canteen. There's a Health Drink behind where you land, then you can approach the lit-up corpse to find Eddie, who appears to be losing it. When you regain control, head through the double doors and enter the door directly ahead to find a save point, the Toluca Prison Map, Handgun Ammo, Rifle Rounds, and a Memo. You'll also spot the Rifle locked away in a cabinet, so we'll need to acquire that via solving a puzzle later on.

Memo #1: Gun Cabinet Notice

After speaking to Eddie in the cutscene at the start of Toluca Prison, go through the double doors and enter the room directly ahead to find the Gun Cabinet Notice next to the locked cabinet with the Rifle inside.


Back out in the hallway, go into the Chapel and approach the altar to find The Heaviest Weight, then in the Vestry next to it is a book extract to read. With this section explored, the only path open to you is the one into Block A and Block B. In here, at the beginning and end of each cell block row, are levers you can pull that'll turn the lights on for a short amount of time. The mechanic isn't essential because you can simply pull the cell doors open, but they do make seeing a little easier. In A3, you'll find Rifle Rounds and a Glimpse of the Past.

Glimpses of the Past #1

In Cell A3 of Block A on floor 1F, interact with the shrine in the back corner.


In Cell A5 there's Handgun Ammo, then in Cell B1 you'll find a Health Drink. Enter Cell B3 and break down the wall leading into Cell A8, which holds Shotgun Shells. With the cells searched, head east into the Yard. As you walk in, you'll hear something running around in the dark. Approach the Scales in front and place The Heaviest Weight on it. While you were searching the two Blocks of cells, you likely noticed the sculptures of an Eyeless Boar, a Hornless Ox, a Headless Serpent, and a Wingless Dove. By placing the two weights on the Scales correctly, we can open the doors they've been engraved into. The first one you can open is the Headless Serpent, which is done by placing the heavy weight on the right and the lighter one on the left.

Return to where James marked it on your map, allowing you access to Death Row / 1F Serpent Section. Cut through the Guardroom and work your way through the next cell block, searching E4 for a Memo of a Family Photo. Every other cell is locked, so head through the door in the northwest leading to the Witness Room.

Memo #2: Family Photo

Search Cell E4 on the Death Row / 1F Serpection Section floor to find this Memo.


Feel free to save your game, then interact with the Generator next to the locked door. For the solution to power up the Witness Room Generator, click the following link:

Silent Hill 2: Toluca Prison Walkthrough 14
Image: Push Square

Having unlocked the door, enter the Death Chamber and take the Medium Weight off the chair. Re-enter the cell block area to find all the previously locked cells opened, and the door leading back through the Guardroom locked. To progress, go to Cell E10 and squeeze through the gap in the wall to reach the left-hand room with the Armory Key and ammo and health supplies inside. You can reach the Witness Checkpoint through the door, then unlock the next door to return to floor 1F Main Section. Now you have the Armory Key, you can unlock the cabinet with the Rifle inside.

Now return to the Scales in the Yard and place the Heavy Weight and the Small Weight on the left-hand side, and the Medium Weight on the right. This unlocks the Hornless Ox door in Block A.

Silent Hill 2: Toluca Prison Walkthrough 19
Image: Push Square

Head there next and take the stairs up to floor 2F. Take the Memo off the left-hand wall, then head right along Block C to the Guardroom, where in the desk drawer you'll find the Block D Key.

Memo #3: Guard's Letter

After arranging the weights on the Scales to unlock the Hornless Ox door, go up the staircase right after it and follow the corridor on floor 2F to the left to find the Guard's Letter pinned on the wall next to a door.


Use the Block D Key to enter, then follow the corridor around to Cell D5 to find a Shiv Key hiding in the wall and a Threatening Note.

Memo #4: Threatening Note

Having found the Block D Key, enter Block D and head inside Cell D5. The Memo will be pinned to the wall in front.


The Shiv Key can be used unlock Cell C4 on this same floor, where a crawlspace will allow you access into the inner workings of the prison behind the cells. You'll find a Paranoid Note on one of the pipes.

Memo #5: Paranoid Note

When you use the Shiv Key to unlock Cell C4, use the crawlspace and on the other side will be this Memo placed on a pipe.


Squeeze through the pipes on the left to find another crawlspace down on the ground to your right leading into the Toilets. You won't find much in here, but continue on into the Changing Room for a Syringe, Rifle Rounds, and another Memo.

Memo #6: Crumpled Note

Shortly after Memo #5: Paranoid Note, pass through the Toilets into the Changing Rooms to find this Memo placed on a bench.


Enter the Showers area next to stock up on plenty of ammo, as well as a Glimpse of the Past on the right-hand wall as you enter. On the back wall is a hole James can stick his hand into; accept the search prompt 3 times to get the Heavy Weight. The room will come alive with enemies as soon as you pick it up, so be careful.

Glimpses of the Past #2

When you enter the Showers area on floor 2F, hug the right-hand wall from the perspective you enter from, and this Glimpse of the Past will be on the ground next to a moldy part of the wall.


Retrace your steps back through the Toilets and Block C to take the staircase back down to floor 1F and the Scales in the Yard. Now it's time to unlock the Eyeless Boar door, which is done by placing the smallest weight on the left, and then all the others on the right. Go there now to gain access to the Boar Section of floor 1F.

Silent Hill 2: Toluca Prison Walkthrough 35
Image: Push Square

Follow the corridor around to the right to enter the Warehouse, where 2 enemies need killing. You can then pick a Strange Photo up off the desk and grab some ammo.

Strange Photo #1: Old Man's Always Prepared

Having arranged the weights on the Scales to open the Eyeless Boar door, head into the Warehouse via its eastern door and pick the Strange Photo up off the desk.


Leave and head for the Visitation Room next, where in the final booth will be a Memo called the Prisoner's Letter.

Memo #7: Prisoner's Letter

In the Visitation Room of the Boar Section on floor 1F, search the last booth to find this Memo.


Climb through the window next to the Prisoner's Letter to reach the other side, then follow the path around to a corridor surrounding the Break Room. In its southwest corner is another one of the Glimpses of the Past, then in the Break Room itself is ammo and a note to read off in the smaller room where the desk is.

Glimpses of the Past #3

In the corridor surrounding the Break Room in the Boar Section of floor 1F, head for the southwest corner where chairs and beds are stacked up against a door. In front of them will be the Glimpse of the Past on the ground.


The Infirmary is your next port of call, where just as many ammo and health supplies await as there are enemies. Search the area once the latter are dead, then head for the back room to find the Upper Floor Key and a Memo on the desk opposite it. The Upper Floor Key can be used on the locked door in the corridor that surrounds the Break Room, so double back and unlock it next.

Memo #8: Unfinished Report

In the Infirmary area, head for the room at the back and you'll find the Unfinished Report on a desk opposite the Upper Floor Key.


The staircase will take you up to a new section of floor 2F to unlock a shortcut into Block C and Block D, and then further up onto floor 3F to the Warden's Office. Save your game in the room to the left, then interact with the Typewriter on the main desk. All you have to do here is press the "Tab" key — the one you default to when interacting with the Typewriter — 3 times. This opens a drawer below it to reveal the Light Weight.

Now go back to the Scales in the Yard and position the weights as follows to unlock the Wingless Dove door:

Silent Hill 2: Toluca Prison Walkthrough 50
Image: Push Square

You'll be in the Basement for this section, and will become trapped inside once you squeeze through the gap in the cells. You'll find the occasional ammo and health supply in some of the cells, but your main task is to follow the corridor around to the room opposite Cell F15, accessed via a crawlspace on the floor. On the right is a panel next to the exit door, which can supply power to both Cell F5 and Cell F6 using it.

Turn both lights green, and go investigate the two cells. Inside Cell F6, you'll find The Lightest Weight. Picking it up locks the door behind you, and it'll seem like someone is banging it from the other side. Grab the Confession off the wall, then the banging will eventually stop.

Memo #9: Confession

Enter Cell F6 after supplying power to it and pick up The Lightest Weight off the ground. Doing so locks the door behind you and reveals the Memo pinned to the wall.


Once you're able to leave Cell F6, enter Cell F9 and break a hole in the wall to access the ladder in Cell F10. This takes you back up to the main floor 1F, granting easy access to the Scales in the Yard. When you return, a Gallows will appear behind the Scales which depicts someone being hung and 2 Pyramid Heads. Make a save, then interact with the Scales. This time, you need to make the dial point straight upwards towards the sword. Here's the solution to do so:

Silent Hill 2: Toluca Prison Walkthrough 56
Image: Push Square

For solving the puzzle, you'll earn the Execution Lever, which can be placed in the slot on the Gallows. You now need to match up poem verses, with the solution found through the link below:

Once you've correctly lined up the poem verses and pulled on the right rope, you'll drop through the floor into a new area. Go through the morgue and jump down the hole when prompted, then do so again at the next hole. The Elevator at the bottom will automatically start operating once you go inside it, and when you reach the bottom, make a save and follow the corridor into a house and then through a door covered in paper. You'll find Angela on the other side in a cutscene... but also the Abstract Daddy.

This is a boss fight that takes place across a few hallways and homely rooms, and it'll be constantly chasing you throughout the encounter. We recommend constantly sprinting away so you can create a bit of space between you and the boss, and turning around quickly to blast it with either your Shotgun or Rifle. If it gets too close, it'll grab you in a quick time event sequence, dealing damage. Repeat this process a number of times until the boss disappears and a new corridor opens up that's lit with lamps on the walls.

You should briefly spot Angela up ahead, who you need to follow while the Abstract Daddy destroys the corridors around you. When you find the static TV, break it with your Steel Pipe. The Abstract Daddy will appear quickly once again and grab you for a quick time event, and you can escape behind it afterwards. Climb through the open window and then squeeze into the cupboard filled with newspaper clippings. Exit to the left, then the boss will reappear, allowing you to damage it more. Go past where you saw it come from and follow this corridor through, eventually passing an operating fan and then smashing another static TV.

There'll be a third TV to smash in the next area, and then doing so transports you to the next location that's filled with breathing fabrics on the walls and active machinery blowing out smoke. Climb through the fan and you'll enter a larger room, where the final showdown with Abstract Daddy will commence. Continue to blast the boss with your Shotgun and Rifle while avoiding its grabs and it'll eventually die and a cutscene will play.

When you regain control, go back the way you came prior to the boss fight and James will automatically bring up a map he's putting together himself of the Labyrinth, which is where our Silent Hill 2 Walkthrough continues.


Did you find our Walkthrough covering the Historical Society in Silent Hill 2 and all its Collectibles useful? Our Silent Hill 2 Walkthrough continues in our Labyrinth Walkthrough, and we have even more guidance and information in our overall Silent Hill 2 guide.